Sight-reading resources for harp

I’ve spoken in previous blog posts about the importance of developing both your sight-reading and learning by ear skills for playing the harp.

Today I wanted to focus in on some of the great resources out there for practising your sight-reading.

  1. A to G of Sight Reading for Harp by Harriet Adie (pre-grade 1 - Grade 3 level)

    I love this series of books by Harriet Adie. She really breaks sight-reading down into individual technical components, and there are lots of handy tips on each page. Each chapter concludes with simple quizzes that both challenge the student on the work completed and encourage a 'think first, play later' approach.

  2. Sightreading for Harp Series by Anna Dunwoodie and Lisa Williamson

    Two New Zealand harp teachers, Anna Dunwoodie and Lisa Williamson, designed this series of books to give students practice in sightreading. The books have 250(!) exercises in them, which are all original compositions, and can be easily taught or practiced on a daily basis. Books 1 and 2 are for any harp. There are two versions of Book 3: one for lever harps, and one for pedal harp.

  3. ABRSM Specimen Sightreading Tests

    If you are preparing for a harp exam, this book, published by ABRSM will give you an idea of the level required. The tests, for pedal and non-pedal players, explore different keys, styles and tempi and are representative of the technical levels expected in each exam.

  4. Harp Sight reading by Stuart Green (Book 1 and 2)

    These books use a graded approach designed to develop reading skills, providing varied musical examples of progressive difficulty.

  5. Sight Reading for Harp by Fiona Clifton-Welker (Grade 1-5)

    These are graded books at 5 levels, each with 40 exercises.

Why harp warm-ups and technical exercises AREN'T the same thing!

Since launching my new Technical Exercises for Lever Harp book, I’ve been talking a lot about how to use the book and the role of technical work for harpists in improving their skills.

I often hear people talk about their technical exercises as ‘warm-up’s’ but I think there’s a really important distinction between the two, which I’m going to talk about today. For me they are totally different things, with different end goals.

HARP WARM-UPS

A ‘warm-up’ should do just that - it should warm up the muscles that you will use for harp playing in a safe way. A good warm-up before a practice session will

  • dilate your blood vessels, ensuring that your muscles are well supplied with oxygen

  • Makes muscles supple and therefore flexible

  • raises your muscles' temperature for optimal flexibility and efficiency

  • Stimulates the brain as blood flow increases

  • Can help prevent strains and injuries - particularly over the long-term

My ‘warm-up’ routine involves stretching (for some ideas of stretches see this previous blog post) to warm up all necessary body parts for playing harp including fingers, wrists, elbows, shoulders, and arms.

Once my muscles are feeling warm, I will then play a few scales and arpeggios at a slow tempo and mezzo-forte dynamic, being sure to get as full a tone as possible, and making sure my fingers are using their full range of movement.

By this point I will feel ‘warmed-up’ - i.e. my body and brain are primed and ready for the main work ahead, so NOW I will move on to my technical work.

TECHNICAL EXERCISES FOR HARP

Technical exercises, by contrast, are your opportunity to improve and expand your technical skills.

I have seen a lot of learners simply going through the motions with technical exercises, and treating them as little more than 'warm-ups'. They play them once or twice, at a moderate pace, but aren’t really challenging themselves. This is the OPPOSITE of what they should be - whatever level of player you are, your technical exercises are a chance to really push outside your comfort zone.

For the same reason there is NO exercise that’s too easy - even a simple scale can have many ways to use it to stretch yourself.

I tend to choose just a couple of exercises a week, and really spend time with them so I know that I’ve completely mastered that one before moving on to another.

Here’s the step-by-step process I’d use

  1. Read through the exercise a few times to get familiar with the notes

  2. Analyse it to really understand the shapes you’re playing e.g. identify the chord/inversion/handshape so you really engage with the theory at the same time

  3. As soon as you can, memorise it. This is really important, because you can’t be trying to read at the same time as looking at your hand properly.

  4. Once you're comfortable with the basics of playing an exercise, don't simply move on - instead, increase the speed, try it in different rhythms, apply dynamics and articulations. Push yourself and expand your abilities!

TIP!

I think it's really useful to make a little note beside each exercise of the date you practised it and the maximum speed at which you could play it accurately. Then the next time you visit it you know where to push yourself from, plus it’s really motivating to track your progress!

So in summary - make sure you are truly warming up your body and brain at the start of each practice session and then move on to technical exercises with the mindset to increase your skillset!

BUY YOUR COPY OF TECHNICAL EXERCISES FOR LEVER HARP HERE: https://www.ailierobertson.com/harp-music-shop

What are your Harp Goals for the new term?

What are your harp goals for the new term?

It’s the start of a new term, so one of the things I’ve been doing a lot with my students is talking about goal setting for the year. What pieces do they want to learn? What do they want to achieve?

I consider this a really important piece of my teaching with a student - it might even take up a whole lesson, but then it keeps us on track for the months to come.

In the Lewis Carroll classic Alice’s Adventures in Wonderland, there’s a great quote:

One day Alice came to a fork in the road and saw a Cheshire cat in a tree.

‘Which road do I take?’ she asked the cat.

‘Where do you want to go?’ was his response.

‘I don’t know,’ Alice answered.

‘Then,’ said the cat,‘ it doesn’t matter.’


Having a goal in mind gives you something specific to aim at. Without one, as the Cheshire Cat says, you might find yourself wandering aimlessly.


Step 1: Goal brainstorm

Step 1 is to brainstorm all the goal ideas you can think of. These might be about pieces you’d like to learn, performances you’d like to give, techniques you want to develop etc.

So examples include

Memorise one piece every month

Practise sight-reading every day for 15 mins

Improve your learning by ear

Learn a new musical genre

Take a music exam

Perform a public recital on June 25th


Step 2: Narrow down

At this point you may have a huge list, so now decide on your top priorities. Make sure these goals are SMART:

Specific - What specifically do I want to achieve?

Measurable - How will I know when I have reached my goal?

Attainable - Is it possible for me to reach this goal?

Relevant - How relevant is this goal for me? Does it correspond to my level?

Timely - How much time do I allow myself to accomplish this goal? Is it a short-term or long-term goal? Give yourself an end date by which to achieve it.

Step 3: Break down each goals

Now that you have decided your main goals for the year, take each on in turn, and make a list of all the steps you need to take to accomplish each goal and, when possible, write down a deadline or a timeframe for each step.

I like to work in weekly chunks for this. So an example might be, I want to perform a recital of 10 pieces on June 25th. So the first thing I would do is work out how many weeks I have til the deadline e.g. 16 weeks. Now I normally like to give myself a 2 week buffer as we all know life can be unpredictable. So let’s say we have14 weeks to work with.

Next, I would decide the 10 pieces I wanted to learn. Decide NOW so that you can’t procrastinate in indecision later.

Then I would grade, on a scale of 1-10 where I’m currently at with each piece. Using this, I’d determine how long I think I need to work on each piece to get it performance ready.

Then I’d make myself a schedule where I work out how much practise time I have, and therefore how much time I can devote to each piece, and then I’d write it down in my calendar.

In this way you break down the goal into smaller chunks which help make it more achievable, and also more likely that you’ll keep on schedule.

These are not new concepts, but knowing something and doing it are different things. Now is such a great time to take a step back, decide on your goals, and then make a plan to achieve them!


A simple tip for playing faster on the harp

One of the most common questions I get from learners is “How can I play faster?”

For many people, playing faster on the harp feels like a big hurdle they can’t overcome. As a result, they get frustrated and often then find themselves shying away from faster pieces, which only exacerbates the problem. Using the excuse that I "can't play fast", rather than working on developing the neuro-muscular pathways and techniques required in order to play fast will never improve your ability to play fast, so it’s time to tackle that belief head on!

So, how do you play faster on the harp? Well, there are lots of factors that play into it, and I’ll discuss these more in future blogs, but for today there’s just one thing I want to focus on, and it’s pretty simple: If you want to be able to play fast pieces, you have to get used to moving your hands fast! Or in other words, in order to play fast .... we must play fast!

Now before you say, ‘but Ailie, that’s exactly what I just said I can’t do’, hear me out! In the same way as a sprinter wouldn’t train to run faster by jogging, you can’t expect to be able to play fast harp tunes, if you don’t practise moving your fingers fast! You have to train for the activity you are trying to do! Whilst working slowly is mandatory when learning the piece and to fix most technical issues, there are some technical details that cannot be worked at slow speed. There are different techniques required to play fast piece than there are with slower pieces. To play fast pieces we have to work on developing our neural pathways, and playing slowly all the time will never develop them.

When you train to play faster you are training your nervous system to react more quickly. Studies have demonstrated neuroplastic adaptation of the motor cortical functions responsible for dexterous finger movements through musical training. Enhanced movement of the fingers results from neuroplastic alteration of finger muscular coordination. (https://www.ncbi.nlm.nih.gov/pmc/articles/PMC6704118/)

The same muscles are involved when we play fast or slow, but there is a difference in finger preparation; When we play fast, the preparation must begin earlier, while the other finger is still working for the precedent note. Thus, developing the ability for fast movement in our muscles is done through constant training of the brain and muscles to move fast .

Now, in the context of a piece, particularly a new piece, it’s very hard to think about the notes you should be playing, the rhythms, the coordination of the hands, the phrasing, and ALSO try to increase your speed. For most people, this just doesn’t work effectively, and each new piece keeps feeling like a challenge.

What I think is FAR more effective is to use scales, arpeggios, and other technical exercises to help build the necessary finger speed to play passages of music fast. By keeping the actual musical content relatively simple, you can really focus on building the speed of these exercises.  Choose a really simple pattern, or use exercises like the ones in my Technical Exercises book, memorise it so you don’t need to look at the music, and then really focus on getting your speed up, without having to worry about anything else.

 When trying to increase tempo, it definitely helps to push yourself past your comfort zone, even if it means mistakes. Spend some time each day just going as fast as possible - guns a blazing, mistakes and all.  Of course I don't do this all the time, but I've found that doing it can lead to breakthroughs as I push through "invisible walls" that were holding me back. Just don't try it before you've really learned to play an exercise.... that will lead to sloppy playing.

Play with a relaxed hand, focusing on getting your fingers to react quickly without tensing. The feeling of playing fast should not feel more tense than playing slow.   Working with a metronome is an important step but don't ramp up your speed until you can master the current tempo completely relaxed and fluid

This all said, speed is one element we all should have in our bag of tricks but never let that be the primary focus of your playing.  It's the seasoning, not the meat and potatoes!  Tone, phrasing, and dynamics are what draw most listeners in, not raw speed.  

harp speed

10 Tips and exercises to improve your relationship with the metronome!

I received an email a while back asking for advice about how to use a metronome, and I thought it was a really important topic so decided to make a blog post dedicated to it as this is a common issue for learners.

 Many people find it SO difficult to listen to the metronome and find it completely messes up with what is going on. Others simply cannot keep the beat with it. If you’re not sure whether or not you use the metronome properly, you probably aren’t. There’s a learning curve with this, and many students have a hard time with this.

So let’s tackle these issues.

The ability to play in a steady rhythm is, for most of us, something that has to be learned  The good news is that metronome skills can absolutely be learnt – BUT for some people it takes A LOT of practice to learn to play with a metronome. It's like eating vegetables and practicing scales, you just have to suck it up and endure. It will get easier if you keep after it!

I do believe the metronome is so valuable in helping with accuracy, and encourage students to spend time practicing with the it. Metronomes are inexpensive and can be easily downloaded as an App for your iphone/android – I use the Soundbrenner Metronome App


So, before we go into the tips what is a metronome and how should you use it?

A metronome is a device that produces a click at a regular interval of time. You can set how fast you would like it to go based on beats per second. A metronome can help you keep a consistent tempo so that you don’t inadvertently speed up or slow down.

 Why use a metronome?

Brent Hugh, a professor of piano in Missouri, states that use of a metronome

·       Helps feel the steady beat so you keep a consistent tempo and you don’t inadvertently speed up or slow down.

·       Learn to synchronize with an outside rhythmic pulse (preparation for ensemble work, accompanying)

·       Shows rhythmic errors clearly--can help develop precise rhythmic playing

·       Can help in "step-by-step" practicing to reach a certain tempo

 (https://brenthugh.com/piano/metronometeaching.html)

Metronome critics can say that it makes music mechanical and takes away the flow, and yes, many pieces shouldn't be played in a totally strict rhythm when you're performing it, but for most students I think the danger is more in the other direction. Once you've learned to play it strictly, it's really not that hard to go back and use rubato, etc. But you have to allow time for that step in your practice schedule!


When you're following the tempo, the TICs of the metronome will coincide perfectly with the main beat/notes of the piece. Most often, one click equals one-quarter (crotchet) note. So, in 4/4 time, each metronome click equals one quarter-note and four clicks equal a full bar. If you are playing at a slow tempo, having the metronome in eighth notes (quavers) may help.

 Compound time signatures are subdivided into dotted quarter notes, most notably 3/8, 6/8, 9/8, and 12/8. For instance, two dotted quarter notes equal a complete measure of 6/8. So, when using a metronome in 6/8 time, I usually opt for two clicks, where each click is a dotted quarter note.

Most metronomes also come with an accent feature that allows you to place an accent or different tone of click for the first beat. This is really useful!


How to introduce the metronome?

It can be really frustrating to start using a metronome, and try using it on a whole piece so instead, take a step-by-step approach.

1)    Familiarise yourself with a metronome while doing a scale or exercise that has similar rhythm notes. Play simple technical exercises with the metronome--scales, arpeggios, chord progressions etc - ones you don't really have to think about, the simpler the better.  Perhaps learn the exercises first without metronome, then on the second go-round, play them with metronome at a specified tempo. Use exercises that are short are relatively simple so you can play from memory, not reading music. 

•See the bottom of the blog for 5 exercises to build your metronome skills

 2)    Turn on the metronome and simply practice clapping or tapping his head or knees on the beats. This begins to help you feel the pulse without having to think through all the other layers of harp music (playing the correct notes, for example).

 3)    To progress from stage 2, now try clapping the rhythm of your piece with the metronome. It will take away the pressure of playing the notes so that you can truly concentrate on the rhythm.

4)    Now play just the right hand with the metronome, then just the left hand. By stripping away layers of the piece it makes it easier to hear where it’s going out of time

 5)    Assign not an entire piece, but a small section (perhaps 1 or 2 measures) to be practiced with metronome. Small sections can be synchronised with metronome far more easily then long sections.

 6)    Practicing with a metronome should be done when the music is learned. Don’t use the metronome the first time you sit down with a piece. First become comfortable with the music. Then use the metronome where it might be needed to check accuracy or support counting in a tricky passage.

7)    And remember that if you can't follow the rhythm because your hands are not moving as precisely as they should, you should then decrease the speed till you find the one you can comfortably follow.

8)    Count off 2 measures with the metronome before playing, whenever you play with a metronome. Otherwise, you will just start and "hope for the best"

9)    When a student has trouble playing with metronome, it often turns out that the metronome is too quiet to be well heard over the harp! As simple as that! I've seen this many times.  All they need to do is get a louder metronome, or stand closer to the metronome, or practice at a quieter dynamic level!

10) BE PATIENT AND DON’T GIVE UP. Practicing with a metronome can take while to master! Start simple and it will come in time!

I’ll now walk you through 5 beginner exercises for playing with a metronome.


Exercise no. 1: An exercise composed with all quarter notes is a good way to get started. This allows you to get used to the “noise” of the metronome and begin to feel the beats more naturally. Set the metronome to a nice and moderate tempo to give us time to think – 80 is a good walking pace.
 

Exercise no. 2: Whole, half and quarter notes

Our second exercise contains quarter, half and whole notes. This simple Bartok tune has the same notes in the right and left hand, so that you have some brainspace free to concentrate on playing with the metronome. Make sure to give the half notes two ticks and the whole notes 4.


Exercise no. 3: 8th notes

This exercise is for learning how to play 8th notes while the metronome is ticking a quarter note beat. Now we need to fit 2 eighth notes in per tick.


Exercise no. 4: 3/4 time signature

The third exercise is from Berens’ op. 70 collection of easy exercises. This one is for 3/4 training. Many students struggle with playing in 3/4 time, since it has such a different flow compared to 4/4 time.

Screen Shot 2021-08-03 at 12.10.11.png

What I often hear is people who play a 3/4 piece with a 4/4 beat. They leave an extra beat hanging around each bar line. Set your metronome to a 3/4 tempo – it should have a different-sounding “tick” every time it gets back to the first beat. This will help bring your attention to the start of the bar. If you get to a new bar and it doesn’t line up with that louder tick, you’ll know you did something wrong.

This exercise is also slightly more demanding than the first two – you might need to go through and learn how to play it. Just go really slowly – once you can play slow and steady, turn on the metronome and give it a go.

Exercise no. 4: 16th notes

The fourth study/exercise is from Czerny, and it’s all about playing 16th notes with a metronome. It has a lot in common with exercise no. 1 – but the next level of difficulty. You could play each bar in a loop as many times as you want to get a hang of the rhythm.

How many 16th notes should fit inside each metronome tick? Four. These are harder to sync up with the metronome because there are so many extra notes between the beats.

It’s a good idea to start at a slower tempo – let’s say 60. Every set of four should be lining up with a tick. That’s why it’s helpful to play one bar over and over until you’re comfortable – then you can play around with different tempos.

Learning Harp By Ear VS Reading Sheet Music

Learning harp by ear vs from sheet music

One of the most common questions I get asked is whether learning by ear or reading from sheet music is more important when learning the harp. Playing by ear is the ability to hear a piece of music and play it without looking at sheet music. Reading music, of course, is the ability to “read” musical notes, rhythm and dynamics on sheet music, and play a piece accurately

Since starting piano lessons at the age of eight, and then the Clarsach (celtic harp) aged twelve, I have been exposed to many different ways of learning and later teaching music. Sometimes my work involves playing music that has been transmitted entirely aurally and conversely, sometimes it requires me to read or write complex scores. I use both approaches in my career and encourage a similar balance among my students.


Reading Sheet Music Pros and Cons

Sheet music doesn’t just tell you what notes to play; it also tells you how and when to play them. Sheet music provides information about time signature, key signature, rhythms, articulation, phrasing, repeats and dynamics.

Probably the biggest advantage of sight-reading is that it gives you the ability to play literally anything you can get sheet music for. Once you understand how to read music, you can read pretty much any piece just like reading a book.Thus, when compared to learning by ear, more tunes can be ‘learned’ in a limited amount of time.

 However, learning to read music takes work to become fluent and quick. Also, the sheet music can become a ‘crutch’ for many people – if you can’t play any tunes without the sheet music in front of you, or you couldn’t pick up a song from the radio and work out how to play it, it might be time to focus on training your ears more.


Learning by Ear Pros and Cons

Written music doesn’t ever really tell the whole story; many of the subtleties around e.g. rubato or ‘swing’ are hard to convey. Learning a tune by ear forces you to listen carefully and repeatedly to a piece of music, which can often lead to quicker memorisation and more musical playing.

Another strong argument for learning by ear is that essentially music is a language. Just like a baby learns to speak, with music, you hear something and then copy it, and through doing so, learn the ‘language’.

 Learning music by ear is definitely more time consuming, and if you aren’t used to it, you may find it quite difficult at first. But the more you do it, the easier it gets.

Often I find when a student learns by ear they initially make progress very quickly, often faster than if having to read. It gives a great sense of rhythm and timing from an early stage, and really hones to ear to listen to what is being played. However, as a student gets more advanced, only playing by ear may start to become a problem. Whilst it might be possible to understand concepts and play very difficult things, lack of reading skills really slows down how fast a student can learn things, write out music or sometimes follow discussions. It can also limit the amount of material that can be assimilated, and the complexity of that material.

My own thoughts

I use both playing by ear and reading music on a daily basis, both for my own playing and in teaching. Both are valuable ways to experience and understand music. Most people tend to have more aptitude towards one or the other so the opposite approach feels more difficult but it’s worth working on both for the advantages that each give. The two skills are compatible and both part of being a well-rounded musician.

I have concluded that it is not an either/or. It is most definitely an “and” situation. Every student should learn ear training AND sight-reading because both will make better musicians out of them.

What I have found, however, is that relying too heavily on one skill may prevent the other from developing. Thus, I definitely feel the key is to gently encourage the development of both skills for well-rounded musicianship. 

In the next blog post, we’ll look at a number of tips and suggestions for learning by ear.


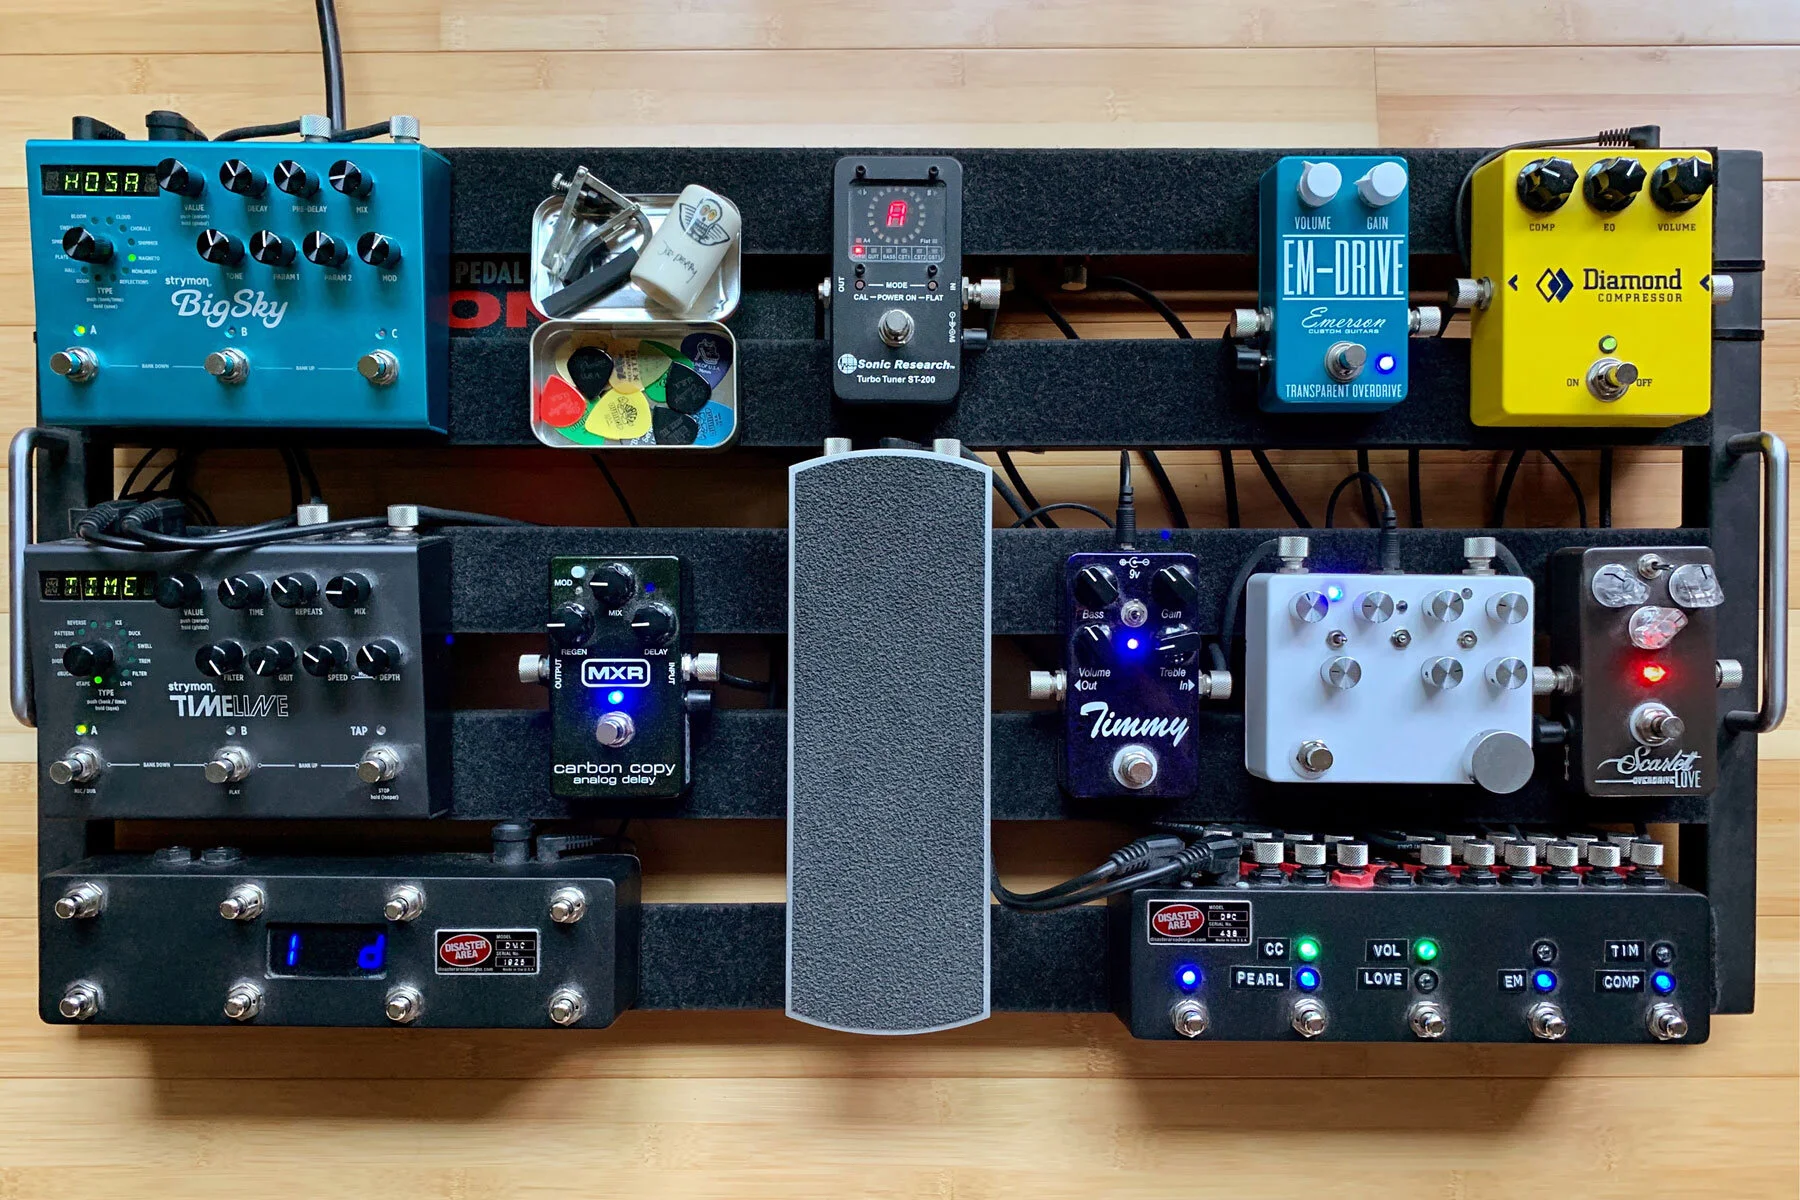
Using effects pedals with your harp and my top picks

If you’re looking to get creative with your harp sound, effects pedals are a great place to start. Effects pedals are used to process your harp’s signal in various ways. They can add a different colour to your sound, make it feel bigger, change the pitch, allow you to loop yourself etc. Essentially, they extend the possibilities of your instrument.

The pros of using pedals with your harp include:

•They are operated with your feet so leave your hands free to play!

•One pedal = one effect – simple and clear to use

•Generally sound great

•No computer needed so easy set up and no risk of crashes!

I often get asked about my top pedal choices so here are my top picks:

1) Loop Pedal - A loop pedal lets you record a “loop” of sound e.g. a chord progression or riff, which is played back repeatedly until you stop the loop. A lot of loopers let you ‘overdub’, meaning that you can record on top of the first loop and form multi-layered pieces of music.

Basic Looper: Ditto: https://amzn.to/3s6LmYT or Boss: https://amzn.to/3d2XC8u

More Advanced Looper : https://amzn.to/39XCoqM

2) Reverb Pedal - A reverb pedal essentially emulates the sound you hear when playing in a large space, where the reflections within the room create an ambient trail or echo.

A good choice is the TC Electronics Hall of Fame - https://amzn.to/3d3Yo5c or a more basic model is this Skyverb from Mooer: https://tidd.ly/2TuOUZi

3) Delay - Simply put, a delay pedal is an echo unit that repeats the notes you feed through it. It’s one of those pedals that can be incredibly versatile – often forming the backbone of a riff or adding ambience to more delicate parts.

I use the TC Electronics Flashback - https://amzn.to/39YtBoc

4) Freeze Pedal - A freeze pedal allows you to ‘freeze’ a sound, and delivers infinite sustain of any note or chord. This is really useful for having a drone that sustains under your tune playing, or for creating ambiance.

I love this one from ElectroHarmonix: https://tidd.ly/3q3jd5G

5) All-in-one unit - Rather than look at individual pedals, you may prefer to get a multi-effects unit that will allow you to do multiple things. These are more expensive upfront, but may save money long-term.

Some good ones are by Boss: https://tidd.ly/3vrKfVd or Eventide H9 - https://amzn.to/3t8RHo2

If you want any advice about pedals just get in touch!

Harp pedal board

Finding and Choosing Harp Fingering

Choosing the best fingering for a piece is one of the most important skills to develop when you’re learning the harp. 99% of the mistakes I see people make are the result of the fingering not being secure enough, so it’s a really vital thing to focus on when learning a tune.

When you look at a piece of harp sheet music, sometimes you will find fingering suggested by an editor or the composer. If you consult a different arrangement of the same work, often we discover the fingering is different. What does this tell us? There is no standardisation of fingering, no matter whether it is from the composer, an editor, or a teacher. The only correct fingering is the one that works for your hand. Fingering in any score is a suggestion only!

We all have different sizes of hands, and different relative finger strengths, so there is no ‘one size fits all’ fingering.

Having said that, it is vital to decide on a fingering and stick to it. Once a fingering has been chosen, practising always with that fingering means that after a while the series of finger movements will become automated and engrained in our muscle memory – we will not have to think about which finger goes where because when we master a new motor skill, we go from active effort (thinking and concentrating) to automatic ability.

If we haven’t taken the trouble to organise a good fingering or we practise with different fingerings each time, we make life so much more difficult for ourselves. Practice makes permanent, so whatever we engrave on our motor cortex is going to stick. This is why it is very difficult to correct embedded errors later – and this includes sloppy fingering.

One of the most common problems I see is students practice hands separately, and the fingering is great, and then when they put a piece hands together the fingering falls apart! This means that your muscle memory hasn’t kicked in enough yet, so keep it hands separate for longer! It’s human nature to want to rush ahead and get something together, but trust me – the more you consolidate one hand at a time, the better the final result will be!

Suggestions for choosing fingering

The following are some suggestions for choosing and embedding fingering:

  • Fingering in any score is a suggestion only. If it doesn’t work for you, try a different option (or ask for help e.g. in the harp chat facebook group).

  • When deciding a fingering you need to look at what comes before and after a note. Which direction have you come from, and where are you going?

  • 99% of the time, we want to use the thumb on the highest note of a run. One way, therefore, to start fingering music, is to write in a 1 on the top note of each run.

  • It is vital to consider the eventual tempo, as well as the dynamic level, articulation, phrasing, shaping, timing and tone quality when working out a fingering (as much as is possible at the start). What works at a slow tempo may be very different at a high tempo!

  • For stretches of a fourth an under, we generally use fingers 1+2, for a fifth and sixth we use fingers 1+3, and for a seventh, octave and higher we use fingers 1+4.

Screen Shot 2021-06-08 at 08.50.10.png
  • If you have more than 4 notes in one direction: think about where to cross (or slide!). Choose the place that makes sense with the phrasing of the tune and balance number of cross overs/unders with which finger feels easiest for you to cross over/under.

  • Related to that, crosses will ALWAYS be the most risky places in a tune, so try and keep them to a minimum, and avoid crossing where there is a gap between notes - try and only cross on adjacent strings.

  • Check if a note pattern is repeated later in the piece. If so, try to make the two fingerings the same.

  • Avoid staying too long in one fixed position. Frequent changes in hand position keep the hand mobile, and thus free of tension.

  • Setting in advance and linking notes is important, but when you have a long note, come off the strings. This will help relieve tension and give a fuller sound.

  • Fingering that feels fine when playing each hand alone might not work so well when playing hands together. Try to organise the fingering with both hands together (after which you can practise hands separately).

  • As you start embedding the fingering during the process of practising, you might find you want to change some of it. Allow a small window of time to do this before settling on your final fingering.

  • Commit to the fingering you have chosen and it will soon reach the automatic stage.

 If you’re struggling with a passage or keep making a mistake, the chances are that it’s fingering related, so stop and really look at if you’ve chosen the best option, or if something else might work better!

The Harp in Irish Mythology

In Celtic mythology, the harp is often associated with the supernatural.

Irish folklore associates the harp with an ancient race of Fairy folk called the Tuatha De Dannan, meaning "People of the Goddess Danu." They were said to have been skilled in magic, and the earliest reference to them relates that, after they were banished from heaven because of their knowledge, they descended on Ireland in a cloud of mist. (Brittanica)

 In Irish mythology, The Dagda was king of the Tuatha Dé Danann. According to Bard Mythologies “the Dagda had many wonderful possessions: his cauldron of plenty, which never ran empty, and could feed as many man as sat down to it; his mighty club, one end of which could kill a man, and the other end of which could restore him to life. But his greatest treasure was his harp, Uaithne. It was made of oak and encrusted with jewels, and only he could get music from it strings. The playing of this harp made the seasons come in the correct order, and could make anyone who heard it laugh for joy, or weep with sorrow.” (https://bardmythologies.com/the-dagdas-harp/)

These properties are know as the Three Noble Strains of harp music:

1) The Goiltai or ‘sorrow strain’ caused people to weep.
2) The Geantrai or ‘joy strain’ encouraged people to laugh.
3) The Suantrai or ‘sleep strain’ lulled people to sleep.

 The Fomorians were great enemies of the Tuatha De Dannan. They believed that taking possession of this harp was the best way to defeat the Tuatha dé Danaan. The stole the harp, hung it on their banquet hall wall, and then feasted in celebration of their victory.

The Dagda was of course furious, and ventured out in search of his treasured harp. They eventually found the hall, and the Dagda burst through the doors. He summoned his harp which flew flew across the hall and into his hands. The Dagda then played The Three Noble Strains of music (The Irish Place).

First he played the Goltrai, the strain of sorrow, which made the Formorians cry uncontrollably. The tears filled their eyes til they could no longer see. In their despair, they reached for their weapons to try and attack.

Then, The Dagda played the next Noble Strain, Geantrai, the strain of merriment. This made the Formorians laugh. They laughed so hard that they dropped their weapons.

Finally, The Dagda played the third Noble Strain, Suantrai, the strain of sleep. This gentle music lulled the enemy into a deep sleep, leaving The Dagda and his warriors free to leave, taking the magical harp with them.

For more about the story see: https://www.theirishplace.com/heritage/irish-myths-and-legends/dagdas-harp-and-the-tuatha-de-danaan/

Regulating your Harp Levers - the why and how!

If your harp is in tune in some keys but not others then the chances are your levers need regulated.

So, what is Lever regulation?

Regulation is the process of setting the levers and bridge pins on the harp so that the levers raise the pitch of the string by exactly one half-step when they are engaged. A half-step is achieved if the lever is pressing the string at the proper location and the bridge, which guides the string through the lever, is at the correct height to stretch the string and produce enough pressure on the lever fret (from Rees Harps)

 Harp levers are properly regulated when there is exactly a half-step in pitch between being on and off e.g. if your F string is tuned exactly to F-natural and the lever is properly regulated then when the F lever is “on” the tone will be an exactly in tune F-sharp.

 Over time however, a common problem is that levers come out of regulation, meaning that when they are engaged, they no longer give a true, ‘in-tune’ half-step. Fortunately, most lever harps can be regulated, and minor regulation adjustments can be easily done by harp owners.

 To see if you need to regulate your harp:

  1. Tune each string precisely with the lever off.

  2. Then, engage the lever and check with an electronic tuner to see if it is still in tune. If it isn’t, you will need to regulate it

When doing minor lever regulation there are two ways to alter the pitch of the note: raising or lowering the bridge or adjusting the lever itself utilising the slots on the lever. For a major regulation, the lever must be removed and reset. Even if you are only doing minor regulation the biggest thing to keep in mind is that a little goes a very long way.

1) Regulating with the bridge pins

You can regulate small discrepancies with the harp bridge pins. The bridge pins are threaded, so as you turn the bridge pin counterclockwise, the pin twists out from the neck. As you turn the pin clockwise it goes further into the neck.

If the levered note is flat, turn the bridge pin counter clockwise. This will raise the pitch of the levered note. Check the pitch and if it’s still flat, turn the bridge pin a little more.

If the levered note is sharp, turn the bridge pin clockwise to lower the pitch of the levered note.
You will need to turn the bridge pin a larger amount for the lower notes and smaller amount for the highest notes to make a difference in the pitch of the string.

Screen Shot 2021-05-25 at 16.23.02.png


2) Regulating with the Lever Slots

If there are bigger tuning inaccuracies, the lever may have to be moved. This is done by sliding the lever either up or down in the lever slots. To do this, loosen (but do not remove) the screws holding the lever so the lever can slide in the lever slots. Move the lever towards the bridge pin to lower the pitch, by creating a longer vibrating string length, or away from the bridge, which raises the pitch by creating a shorter vibrating length. Pinpoint the correct location with your chromatic tuner and tighten down the screws. This type of adjustment must be carefully done, as small movements make a fairly large change in the sharping, especially in the mid and upper range.

When you move the lever, be careful to keep it in line with, and exactly under, the string. Make sure you do not over-tighten the screw!

Screen Shot 2021-05-25 at 16.28.24.png

Good luck and remember a little goes a long way!!!

When To Refresh Your Harp’s Bass Wires

Have you ever felt like your harp just doesn’t resonate as well as it used to? Replacing your bass wires might be the solution!

Bass wires are the metal strings in the lowest octave on your harp. Each bass string consists a plain steel core running straight up the middle and a much thinner winding coils around the core, and this is the part of the wire that you can see. Between the core and the winding is a layer of silk thread which keeps the core and winding from vibrating against one another.

Wire strings rarely break but this doesn’t mean they should still be on your harp for years and years! I have heard harpists brag that in X years they have only had to change X strings. While none of us enjoy strings breaking, keeping old strings on a harp for years is not necessarily a good thing. Harp strings eventually lose their bright sound. Over time, dust and grime work their way in between the coils of the winding, muffling the wire’s sound and dampening its sustain. Old bass wires have a sound that dies quickly, while new ones ring out and hold their tone longer. As wires age, their ability to vibrate sympathetically decreases and tarnish on the coil’s surface will cause it to lose its resonance. This happens slowly so that you may not notice the strings losing their quality, but you may wonder why your harp just doesn’t sound as good as it used to (Harp Herald).

Signs that your wire string has come to the end of its useful life include tarnishing and fraying - these will affect the sound of the string, causing it to be duller.

To keep a harp sounding at its best, particularly if you play a lot, it is good to change your bass wire strings every two years or so (from Norris Harps). if you play less you can probably wait longer, perhaps as many as five years. If you haven’t replaced your bass wires in a long time, try it, and hear the instant improvement in your harp’s tone. When one of my lever harp students puts on new strings, they are always shocked with how much brighter the harp sounds. While they may not have had a problem with the sound before, they had no idea that they were not letting the harp be at its full potential.

artsyshotofstrings.jpg

Sands of Hosta

I hope you've had a great week! 

Here in Scotland things are finally starting to open up again, and we're able to travel out of our Local areas for the first time in months. The sea has always been my happy place, and I can finally get there again! 

To celebrate, I made a video for one of my most requested pieces, Sands of Hosta. I wrote this after a long walk on Hosta beach in North Uist, one of the beautiful islands in Scotland's Outer Hebrides. It was one of those tunes that just almost wrote itself in a matter of minutes, and playing it still takes me back to that magical place. 

I hope it will give you a little feeling of peace and the beauty of Scotland, wherever you are in the world! 

 If you'd like to learn it, the sheet music is available for instant download here: https://www.ailierobertson.com/harp-music-shop/sands-of-hosta-harp

Thank you for listening!

8 Reasons Why You're Not Making Progress on Harp

I often get adult harpists get in contact with me for lessons because the feel they’re hit a slump in their progress. They have become stuck in a rut and unsure how to progress their playing.

This article will cover some of the most common reasons why harpists hit a roadblock in their learning and the action required to overcome them.

1. Too much, too soon

Impatience is one of the main causes of frustration when learning the harp.

What often happens is students try to play faster or play pieces that are more complicated than what their fingers and brain are capable of at that stage, and inevitably fail, leading to frustration.

It's normal to want to challenge yourself as soon as possible, but try not to jump ahead prematurely.

Eg, when working on speed, you want be able to play comfortably, without any mistakes at the current tempo before you notch it up another few BPM. In my January Patreon Practice Challenge we aimed for 10% increase per week – having a set goal in mind can really help, and prevent you going too fast!

2. You haven’t learnt your theory

Many harpists neglect learning theory because it's perceived as boring, or difficult, but theory has an important role in developing you as a musician. Theory helps you UNDERSTAND what you’re playing and why. When you understand how music is built, you gain a much deeper insight into it.

3. You're not learning progressively

Whilst YouTube tutorials etc are great, if you don’t learn with a progressive course, you often don’t consolidate new skills enough, and build systematically on your skill base.

If you don’t have a private tutor, look for books that are systematic and progressive, or better yet, find an online course that takes you logically through a series of lessons and skills.  My Level 2 Harp from the Start course is ideal for elementary players who have got to grips with the basics, and now want to keep working on their fluidity, expand the type of Left-hand shapes they are using, and increase in confidence, with lessons presented systematically and logically.

4. You're not practicing harp regularly enough

Regular practice is one of the most important tools for any harpist. It’s far better to do 20 minutes every day than 3 hours once a week.

Muscle memory and finger strength will develop far quicker with short regular bursts of practice than with long but sparsely separated practice sessions.

5. Your harp practice time isn't focused enough

 Simply sitting at the harp and noodling isn't enough for anyone serious about becoming a decent player. Practise becomes aimless and without clear benefit. You need to have some kind of plan of what you'll cover in each practice session and devote that session to it.

A lot of progress slumps are the result of jumping between different learning elements and therefore never truly nailing any single one of them. The inevitable result is that you never truly master anything.

Check out my FREE EFFECTIVE PRACTICE GUIDE for more thoughts on how to practice better!

6. You're not doing technical work properly... or at all

Technical exercises are a great tool to help give your fingers the dexterity they need for playing. My Technical Exercises for Lever Harp book is a great place to start!

7. You have no clear goals in your mind

Knowing what you want to achieve as a harpist is important because it helps you focus your practice time (see point 5). I have another blog post about this here: https://www.ailierobertson.com/harp-tips-blog/2022/1/4/goal-setting-how-to-set-and-achieve-your-2022-harp-goals

Invest in a good Practice Journal such as this one, which has space for goal setting and tracking. Psychology studies have found that you are 42% more likely to achieve your goals if you write them down! Writing your goals helps you to get clear on what you want to accomplish, and plays a part in motivating you.

8. You need a break!

I know this point may appear to contradict #4, but if you already practice regularly then it may just be you need a rest. A fellow harpist once told me "leave the harp for a couple of days and you'll pick it up with renewed vigour". How true!

Conquering Performance Anxiety

Musicians are supposed to be able to perform with confidence and poise, never betraying the slightest hint of nerves, but in reality, Music Performance Anxiety (MPA) is something that happens to most performers, with symptoms driven by the body’s “flight or fight” response.

We all know the feeling of practising something perfectly at home, and then falling apart in a lesson. And unfortunately, a series of poor performances can result in a vicious cycle of negativity.

Symptoms can be physiological, cognitive and behavioural (from Help Musicians UK).

“Physiological symptoms include increased heart rate, sweating, ‘butterflies’, dry mouth, dizziness, nausea, tics, tense muscles, trembling hands, lips and knees, distorted vision and rapid, shallow breathing. These occur when the body releases adrenaline into the blood stream, activating the sympathetic nervous system (SNS) responsible for the ‘fight-or-flight’ response we need in dangerous situations .

Cognitive symptoms include negative thoughts about the performance (“I’m going to mess this up”), its consequences (“people won’t come back”), oneself (“I’m useless”), and others’ opinions (“people will think I’m a terrible musician”). These can create a vicious circle, when they affect performance and thereby strengthen negative beliefs.

Behavioural symptoms include tense/anxious facial expressions, tense/nervous bodily movements, performance errors, poor sleep and self-medication through alcohol and other drugs.”

All of these can contribute to the feeling of anxiety about performing, but thankfully there’s lots we can do to improve matters.

  • First of all, it’s worth remembering that some level of stress or anxiety is normal and to be expected and even WANTED when performing in public. Healthy stress helps us give optimal performances.

  • As you can see from the picture below from the Musicians Health Survey, 71% of performance anxiety comes from self-doubt. List your anxious thoughts about performing and for each ask yourself, ‘Is this really true? Partly true? If it’s true - so what? How much does it matter? What’s the worst that could happen? What’s a better thought to focus on?

  • Connected to this, often we’re nervous because deep down we know we’re not really prepared enough! Practice. Practice. Practice. Eliminate anything and everything that can go wrong. Practice until you cannot go wrong.

  • Mentally rehearse and visualise successful performances. Imagine your audience enjoying the music. Imagine playing your piece perfectly from start to finish.

  • Build a narrative of success. Rather than jumping in the deep end, seek out a graduated series of low-threat performance opportunities. Start with a video camera or tape recorder. Treat this session as if it were a real performance. Stand up and address your imaginary audience. Keep going, even if you make mistakes. Then move to the next level: a trusted friend or musical associate. Then a few more friends. Etc. (from The Cross-Eyed Pianist)

  • Develop your positive feedback loops. A successful performance helps boost your confidence for your next performance. Choose music which you are entirely comfortable so you can build your ‘evidence of success’.

  • Breathe. Don’t hold your breath. Relax your facial muscles.

Here are some useful further reading resources:

The Inner Game of Music

The Musician’s Way

Mind over Matter - A Handbook for Musicians

Screen Shot 2021-04-13 at 16.32.42.png

Image from https://composeddocumentary.com/2015-musicians-health-survey/

Harp Exams – What are your options?

A harp exam is a practical exam usually conducted by a recognised exam board. There is absolutely no requirement to sit these, but some learners like them as a way to set goals and assess their level.

The practical exams usually consist of performing 3 or more assigned pieces plus technical work such as scales, arpeggios or studies, and additional musicality tests, which may include aural tests, sight-reading, general knowledge and more.

Harp exams are conducted by an examiner trained by the exam board. They will hold deep knowledge of the competency requirements for each level (or grade, as most exam boards call them).

There are quite a number of exam boards in the world, but for lever harp, the most popular ones are ABRSMTrinity College London and RCS Traditional Music Graded Exams.

Each exam board sets forth its own exam criteria and submission rules. This blog post gives a comparison between the 3 most common exam boards found in the UK: ABRSM, Trinity and RCS. Often people ask which is the ‘best’ exam board to follow - I think it is not a matter of ‘better or worse’, but they are different according to your goals and targets in your musical education.

N.B.. ABRSM and TCL go up to Grade 8. RCS only go up to Grade 5.

Pieces

ABRSM – There are 3 lists of pieces (A, B and C), each with 6 different choices.  The candidate picks one piece from each list. The syllabus lists feature a broad range of repertoire, with items to suit and appeal to candidates of differing ages, backgrounds and interests, however is definitely more slanted towards ‘classical’ style pieces. Syllabus last revised in 2019.

 Trinity – There is a long list of pieces and the candidate picks 3 contrasting choices.  Big mix of styles available. There is also an option to enter your own compositions for one of the pieces. Syllabus last revised in 2020.

RCS – The music for this syllabus is all Traditional in style. There are 3 lists of pieces: 1) Airs, 2) Dance Tunes and 3) Recently-composed Tunes. The candidate picks one piece from each list. Rather than have to buy 3 separate books, most of the pieces are published in one edition.


Technical exercises

ABRSM – there is a large number of scales, arpeggios, dominant 7ths etc – which increases with each grade you take

Trinity – Candidates perform one of the following options:

◗ Scales, arpeggios & exercises

◗ Studies

In option 1, Candidates prepare the scales and arpeggios set for the grade, and play a selection as requested by the examiner. Exercises are also played.

In option 2 candidate play Studies - specially composed short pieces designed to demonstrate and develop key areas of technique through performance. Candidates should prepare all three studies listed for the grade, two of which are played in the exam. One is chosen by the candidate and one by the examiner.

RCS - Technical work for Scottish Traditional Music Graded Exams will include a limited number of scales, arpeggios and technical exercises.

Supporting tests

ABRSM – in addition to scales and pieces, students are also tested on sight reading and aural skills.

Trinity – At Initial to Grade 5, candidates choose two supporting tests from four options:

  • Sight reading

  • Aural

  • Improvisation

  • Musical knowledge

At Grades 6–8, all candidates are assessed in sight reading, and choose either aural or improvisation for their second supporting test

RCS – There are two components to this – a Quick Study and Practical and Aural Musicianship. The Quick Study, in which you are to play back a short piece of music, can be done by ear or by sight. Practical and Aural Musicianship (PAM) comprises a short series of tests designed to encourage your understanding of traditional rhythms and tune idioms, and challenge your ability to echo and improvise responses to musical prompts. 

All in all, exams can be an enriching part of your harp journey, but they are in no way a necessity. When used correctly, they can offer an invigorating challenge, if used incorrectly, they are often the main reason students quit harp lessons.

If you want to take exams, make sure you inform your teacher asap. It may mean a slight change in focus in your lessons, and it will undoubtedly help them with their lesson planning!

What I use to make my harp videos

One of the most common questions I get asked is what devices and accessories I use to make my harp videos. The good news is that you don’t need expensive equipment to make great looking videos.

There's two ways you can make your videos - straight to your phone, or capturing the audio and video separately. I’ll discuss both, but first, here’s some handy equipment that will make your videos look much better, whichever technique you use:

(Disclosure: Some of the links below are affiliate links. This means that, at zero cost to you, I will earn an affiliate commission if you click through the link and finalise a purchase.)

Helpful Equipment:

Light - One of the most important factors is definitely light! You can use a super-expensive camera and still end up with a low-quality video if your lighting isn’t right. I used to just reply on lamps around my home, but in November I invested in a softbox light, and the difference has been dramatic! This is the one I use - EDSSI Photography Softbox

Tripod - Whether you’re filming from your phone or with a camera, an adjustable tripod is a massive help! Camera stands and tripods give you the flexibility to position the camera wherever you want it for the perfect camera angles. I just use this Amazon Basics tripod which is cheap and lightweight and let’s me film from a variety of heights and angles. If you’re filming with an iphone, you’ll also want a phone mount for your tripod - I use this adjustable one which let’s me film in portrait or landscape mode

A good all-in-one light and stand option is this one that has a ring light with a phone stand incorporated.

1) Filming Straight To Your Phone:

Pros- Easier, takes less time, less expensive if you don't already have recording equipment. After you learn some proper lighting techniques, you may find that your smartphone is fully capable of recording fantastic quality videos.

Cons- Less good sound and picture quality (the bass is usually a little lost) - To be honest though I now film most my things just on my phone and it’s pretty good (I have an iphone 8)

2) Filming the Audio And Video Separately And Then Combining It:

Pros: You can get your tone exactly as a want it and clean everything up through your recording software. 

Cons: It takes a bit of time and can be tricky if you don't have a ton of experience editing tracks. You also will have to match the audio and video so everything is cohesive.

I do a mixture of these two methods, just depending on how professional it needs to look and sound.

Filming straight to your phone is definitely the easiest option - I just set my phone up on the tripod about 2m away from my harp, set up my softbox light and then get filming! Nice and easy!

When I want a better sound quality I record with a microphone into my computer. The basic idea is that you connect your harp to your computer and record your harp directly into a DAW. The big advantage of this method is that you can easily get the perfect tone before or after recording.

Here is a basic rundown of what you need to record directly to your computer:

You need to somehow connect a microphone to your computer. There' is a great microphone that plugs directly into your computer via USB that’s made by Blue Yeti - I know Grainne Hambly uses this and it sounds amazing! With this option you don’t need a separate audio interface, so it’s pretty cost effective.

The other option, especially if you’re using more than one microphone, is to connect to your computer via an Audio Interface. There are plenty of different interfaces with the main difference between them being the number and type of inputs. A simple audio interface like the Focusrite Scarlett 2i2 is what I use, and is incredibly popular for producing studio-quality recordings at a low cost.

For microphones, again there are lots of different options and it massively depends on your budget, but I personally use either an Aston Spirit Condenser Mic, a Rode NT1A or a matched pair of Rode NT5s.

DAW (Digital Audio Workstation)

The DAW is the software you use to record your harp and then edit the sound. There are quite a few different options and each work in different ways. Apple have a free programme called Garageband which is great, and there’s also a free programme called Audacity which is very good. I personally use Logic.

If I’m recording this way, then for filming, I use either just my phone camera, or my DSLR camera - I use a Panasonic Lumix G7. Again lighting is really important!

Once you have all the equipment needed and you have it all set up, it’s time to record! Good luck!

10 Tips for Memorising Harp Music

Some people memorise effortlessly, without even trying, but for others it can be a struggle.  Here are some practical tips to make it easier.  

  1. From Day 1, practice your music with the intent of internalising and memorising it. Don’t wait until you’ve learned it to begin memorising it.

  2. Use good fingering and use it consistently. It will take a lot longer to learn the piece if you are using different fingerings every time. Writing your fingerings in the score will help.

  3. Always memorise the dynamics, articulations, and other markings on the page along with the notes. This will help your sense of musicality in the piece which will help consolidate it more quickly.

  4. Watch your hands as you play. Get used to watching your hands. Look for patterns on the strings as you play. Memorise the shapes as well as the notes

  5. Sing and listen. Be able to sing the melody of whatever piece you might be tackling, and listen to the piece repeatedly! When you can sing the tune without music than you will have it engraved in your mind!

  6. Memorise in small sections. Don’t try to memorise a whole piece all at once - work on just a few measures at a time. Once you’ve got a few bars off by heart, add in a few more.

  7. Memorise hands separately, especially the left hand. The left hand is often neglected and left to chance that it will follow the right hand. But then if a memory slip occurs, it’s often difficult to get the LH back on track.

  8. Designate a number of starting places throughout the piece where you can start the piece at any time. Don’t only play from the start each time.

  9. Practice mentally, away from the harp. Sit on the couch and see if you can mentally play through the entire piece. Try to visualise the score and/or your hands on the harp. Being able to successfully play through the entire piece mentally is a strong indication that you have the piece solidly memorised!

  10. Analyse the theoretical structures and absorb patterns. If you understand a passage ascending is just a variation on an arpeggio for instance , you can directly connect that to what you already know physically and visually. Take the time to look for phrases that repeat, shapes that are based on scales/arpeggios/inversions etc

Do you have your own memorisation tips to share?  Please comment below!


5 Irish harpists to celebrate St Patrick's Day with!

It’s St Patrick’s Day tomorrow! Whilst the lockdowns mean there’s not a lot of celebrating to be done, there’s still lots of great Irish harp music to listen to!

Back in 2005 I studied for an MA in Irish Music performance at the Irish World Academy of Music and Dance in Limerick, and during that time I absolutely fell in love with Irish harp. Here are some of my very favourite harpists:

1) Michael Rooney

Michael Rooney is a prolific composer and is widely regarded as one of the foremost players of the traditional Irish harp. He was awarded the TG4 Composer of the Year in 2017.

2) Laoise Kelly

Laoise Kelly, one of Ireland's leading traditional harpers, was awarded TG4 Gradam Ceoil Musician of the Year 2020. She has pioneered a new style of driving instrumental harping.
She has 3 critically acclaimed solo albums, many collaborations & recorded with Ireland’s foremost artists from The Chieftains to Kate Bush.

3) Grainne Hambly

Gráinne Hambly from County Mayo in the west of Ireland is an internationally recognised exponent of the Irish harp, and is in great demand as a performer and teacher, both at home and abroad.

4) Anne-Marie O’Farrell

Anne-Marie is a leading harpist of her generation, who has significantly extended the boundaries of what was considered possible on the Irish or lever harp, broadening its repertoire and chromatic range.

5) Michelle Mulcahy

Michelle Mulcahy is one of Ireland's most talented and gifted multi-instrumentalists in Irish traditional music today. Her array of instrumental mastery spans the harp, concertina, piano, fiddle and accordion.

Trouble with Triplets?

One of the most common ornaments in traditional harp music, the triplet, is also one of the most troublesome!

The triplet (also known as the treble) is a series of three repeated notes . They can be decorative, but primarily serve a rhythmic purpose. There are various possible fingerings - 432, 321, 212 etc are all possible, and the choice will depend on the tune and what direction your fingers need to go in before and after the triplet.

One of the most common problems I hear with triplets is that not all three notes sound equally. Often one note ‘sticks out’ or a note is ‘lost’ so rather than hearing three crisp notes, the triplet becomes lumpy.

A simple way to counteract this is to practice accenting different parts of the triplet. This will require you to really tune your focus into what each individual finger is doing, and check that each note is really sounding.

Try playing these three variations (can be with any fingering) to see if all your fingers are equally strong!

Screen Shot 2021-03-09 at 21.15.05.png

4 Welsh Harpists to brighten your St David's Day

Dydd Gwyl Dewi Hapus! Happy Saint David's Day!

Actually I’m a day late as it was on March 1st, but nonetheless, as Wales is one of the most important harping nations, it’s never too late to celebrate!

Over on my Patreon Page I’m teaching two lovely Welsh tunes this month (plus two Irish ones to come), so check that out if you’d like to learn some Welsh Music for harp. And to continue the festivities, here are 4 of my favourite Welsh Harpists - check them out!


Catrin Finch

Internationally renowned Welsh harpist Catrin Finch is one of the most accomplished harpists of her generation, and has been delighting audiences with her performances across the UK and worldwide, since the age of five.

In 2000 she had the honour of reviving the ancient tradition of Royal Harpist to H.R.H, the Prince of Wales, a position she held until 2004, which was last held during Queen Victoria’s reign in 1873. Since then, she has performed extensively throughout the USA, South America, the Middle East, Asia, Australia and Europe, both as a soloist, and appearing with many of the world’s top orchestras. 

She has recorded for most of the major international recording companies, including Universal Records, Deutsche Grammophon, EMI and Sony Classical.

https://www.catrinfinch.com/

Gwenan Gibbard

Gwenan is at the forefront of today’s thriving Welsh traditional music scene with her unique, contemporary arrangements of Welsh traditional music and songs in the Welsh language. She also specialises in the unique art of ‘Cerdd Dant’, the ancient form of singing Welsh poetry to the accompaniment of the harp, and is one of the few people who performs this music self-accompanied on the harp. Her performances have been far and wide, in numerous festivals and concerts in several countries, and she has released three solo albums on the Sain label.

https://sainwales.com/en/artists/gwenan-gibbard

Robin Huw Bowen

Since 1983, Robin Huw Bowen has introduced the Welsh Triple Harp and its music to thousands all over the world. As the only full-time professional Welsh harpist specializing solely in the Welsh Triple Harp, his influence on the world of Welsh folk music and harping has been far-reaching. He undoubtedly ranks among the most important figures that the Welsh folk tradition has produced.
http://teires.tth7.co.uk/en/index.php

Harriet Earis

Harriet is one of the foremost exponents of the Celtic harp in the UK, specialising in Welsh, Irish and Scottish music. Together with her love of Celtic music, Harriet speaks Welsh, Irish and Scots Gaelic and has a degree in Anglo-Saxon, Norse and Celtic Studies from Trinity College, Cambridge (1998-2001). She is a full-time musician, touring extensively throughout the UK, Europe, Canada and America.

http://www.harrietearis.com/